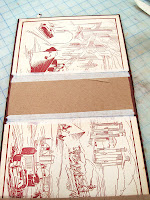
A Rewarding project.
IPad Stand:
2 - 1937 / New Standard Encyclopedia Volumes IV and V (I bought 6 volumes at a yard sale years ago)
The covers are a very nice, embossed, burgundy cloth.
Scraps of Chipboard
3 - Silver Grommets
15" - 1/2" black elastic
PVA Glue
TIP: The stand could also be made using book/chip board and covered in whatever makes you happy...cloth, paper, newsprint, repurposed leather clothing, purse - it's limitless.
PROCESS:
 |
| Spine glued together |
* From here I glued a matching end paper over the spine and onto the edges of the covers.
* A 1/2 strip was cut from the edge of one of the covers cut away from the spine. It was glued to the inside, outer, edge of the bottom cover. This is a stop for the top cover to rest against when propped open. The pull on the elastic from the IPad stops it from slidding back and laying flat.
* I attached 15" of 1/2" black elastic with a grommet to the sides of the top cover and the center of the back cover. It was important to use grommets large enough to capture the elastic and hold it in place while it was being stretched. The 15" length of elastic can be varied depending on the size of your books.
That's pretty much it. Like I said it's easy and fun and pretty and interesting and well worth the effort.
If the instructions are "Clear As Mud" please don't hesitate to email me. I'll be happy to clear things up.


No comments:
Post a Comment